
As we prepared to launch Tribify, everybody agreed that one of the key assets we needed was a short explainer video. And the beauty of the term is that I hardly need to explain what that is. 😁
Anyway, we’ve received so many compliments on the one we put together that I thought I’d share this short piece about how we did it. For reference, here’s the video (which is also at the top of our home page). And while you’re watching it, bear in mind that the whole thing took about three weeks and only cost us about $350 out of pocket… including the tip!
These were the key elements of that success:
The Script
I can’t emphasize this one enough: nobody’s going to want to hear what you have to say if what you have to say isn’t worth hearing!
If it helps, think of your explainer video script as an elevator pitch. The video part is an embellishment, like the whiteboard at a classroom lecture: the viewer should be able to get the entire message in crystal clarity just by hearing the audio… or by reading the script.
So that’s where you start:
- Make your pitch to a prospective customer in under three minutes.
- Write it down.
If this is a challenge, great! Condensing what you do down into a sound-bite is an incredibly effective way of refining your idea of just exactly what it is you do.
Get it? This is an exercise in clarification for YOU. Once you can speak your truth cleanly, clearly, and concisely, it’s a short step to speaking it to your customer.
Anyway, here’s a power move: read the script out loud early and often!
That’s how you are actually going to deliver it. Are any parts hard to say? Eliminate all the ten-dollar words. Break complex sentences down into simple ones. The goal here is to craft a message that is easy to say, because that will translate directly into one that is easy to hear!
When you read the script out loud—and I’m not kidding, you should do it a hundred times—you’re doing more than just refining the way it sounds out loud. You are also practicing saying it out loud: the emphasis, the timing, the delivery. Because just listen to any TED Talk: it all matters.
By the time you actually record the audio, you won’t need the script, not really. It will be a part of you.
How long should it take to write a good script? Take several days at least. A couple of reasons:
- Pay attention: working on your explainer video script is working on your business. You should spend the time because it is time worth spending.
- Expect to workshop the script around a bit to other stakeholders and friends. Give them time to thing about what they read, and pay attention to what they say, especially regarding complexity. If your mom doesn’t understand your product, work on your script until she does.
- There is no limit to the value of a good night’s sleep. It can completely change your perspective on what you wrote yesterday, and that is almost always an improvement!
The Performance
This is actually the fun part, and if you did your homework writing the script, you should be able to get through it pretty efficiently: in a day, maybe two.
Why two days for three minutes of audio? Because, frankly, you’re going to do a lot of takes and it’s physically exhausting. If it takes you more than a couple of hours to get your audio performance dialed in, do yourself a favor and get some rest. You’ll sound way better when you’re fresh.
It’s just audio, right? Nobody can see you. But they can hear you, and every single thing you do shows up in your voice. So there’s a reason I suggest an isolated space in the audio section below, and it’s this: I want you to go a little nuts.
Talk with your hands. Make faces. If you splurged on a wireless mic, pace the room. While you are recording your explainer audio, I want you to over-dramatize every single thing you are saying.
Don’t do it with your voice. Do it with your body, and your voice will naturally follow!
Here’s a video of actual voice actors doing this stuff, and I promise you: you don’t have to be a professional to pull this off. You just need to be alone in a room where nobody can see you.
Remember when I told you to read your script out loud a hundred times while you were writing it? Don’t just read it: act it, just like this. So when it’s time to record your audio, you aren’t making this stuff up as you go along. You’ve rehearsed every gesture, every funny face, and you know where they go because you literally wrote the script with them in mind.
That is how you get to a natural delivery. You could hire a pro to do this for you (and quadruple the cost of your explainer video), but whose product is this anyway? Nobody knows this material like you do.
Plus it’ll make writing your script a whole lot more fun! 😂
The Audio
There are a couple of key conditions to fulfill that will dramatically improve both your experience and the outcome:
- A quiet room.
- A quality microphone.
- A big spoon.
The space you work in is super important! You might think you need perfect silence, but you don’t: if there is traffic noise or rain in the background, you can remove it pretty effectively with noise reduction in post-processing. Much harder are the interruptions: the barking dog, the crying baby. So find a reasonably isolated space where you can make some noise, uninterrupted.
The room also has a sound! High walls and ceilings produce an echo that is difficult to remove, so just better not to have it. If there are curtains or shades, closing them will help tremendously!
Regarding the mic, you’re going to be tempted to record with your phone headset. Don’t! You’ve put a lot of work into your script and your delivery, but audio quality is really where the rubber meets the road. The thing about audio from a phone headset is that it sounds like audio from a phone headset. So get a better mic.

You don’t have to break the bank. A lavalier microphone is the kind you clip to your lapel. If you don’t plan to be pacing around the room during your delivery, then you can pick up a perfectly good wired lavalier mic—which you can plug straight into your laptop—for well under $100. Here’s a perfectly serviceable one, or you can check out this handy guide.
Why the spoon? This is an essential piece of our recording strategy! I’ll explain below.
How to perform the actual recording? Opinions will vary, but if you have enough technical acumen to plug in a microphone, then you can handle basic operations in audio software. You won’t regret it.
- If you already have an Adobe Creative Cloud subscription, install Audition.
- If you don’t, download & install Audacity. It’s just as capable, totally awesome, and free!
So my intent here is not to teach you to use either audio package. That’s what YouTube is for. But your mission is about as basic as it gets:
- Record your audio.
- Trim out any garbage.
- Remove any noise.
- Apply compression.
- Export your audio.
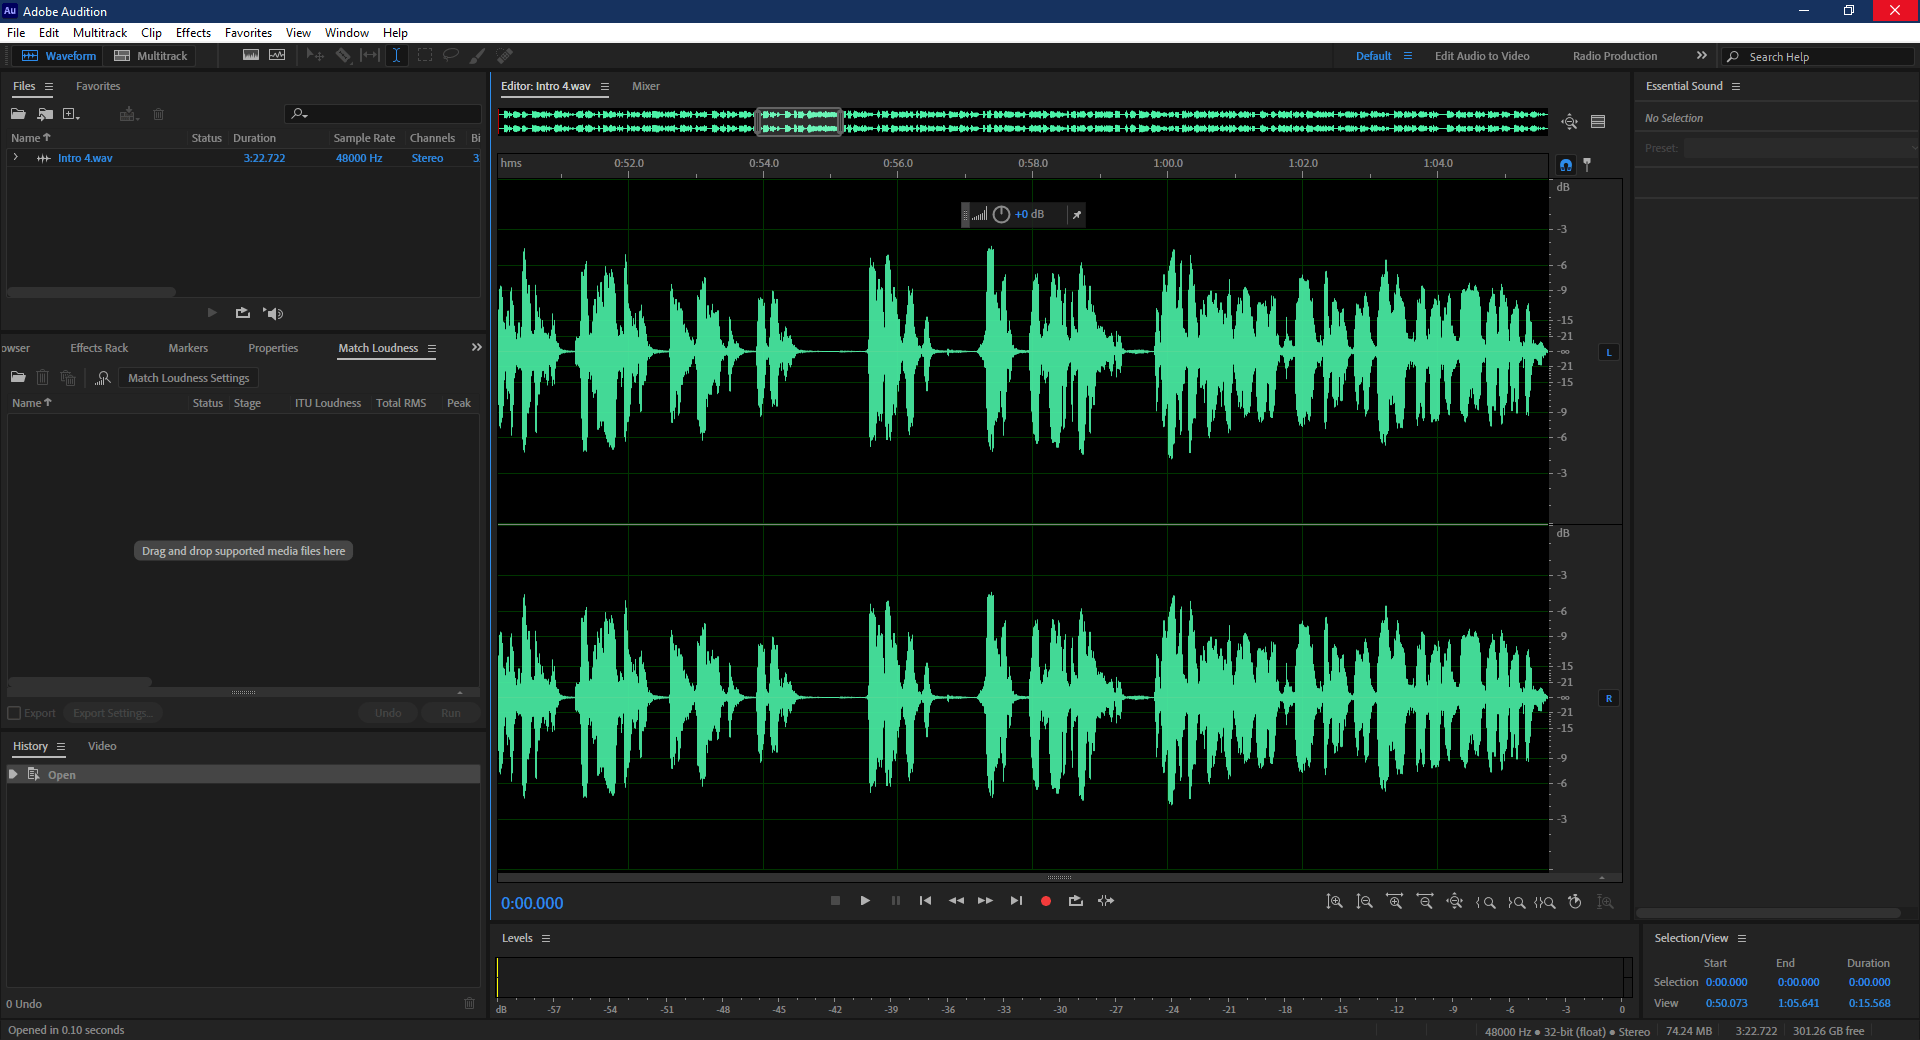
That big spoon Ihe key to your recording strategy! As you can see here, software like Audition or Audacity allows you to visualize your audio stream. So here’s how it goes:
- Record your audio in a single take: just hit Record and go.
- Every time you make a mistake—and, I promise you, you will!—whack the table with your spoon. Then go back to the last place in your script where you paused and took a breath, and pick it up from there.
Every time you whack the table with your spoon, you’ll see a giant spike in your audio stream! This will make it super easy to go back, find the offending parts, and trim them out. Meaning: select them and hit the delete key. Do the same thing for barking dogs and crying babies.
Is there more to that to trimming your video? Sure… but, like I said, that’s what YouTube is for. There isn’t that much more!
Removing noise is very simple, but the process will differ depending on the platform you are using. There are two steps:
- Capture a noise print using a few seconds of “quiet” audio in your recording.
- Click the process button.
If you need help with that, you know where to go.
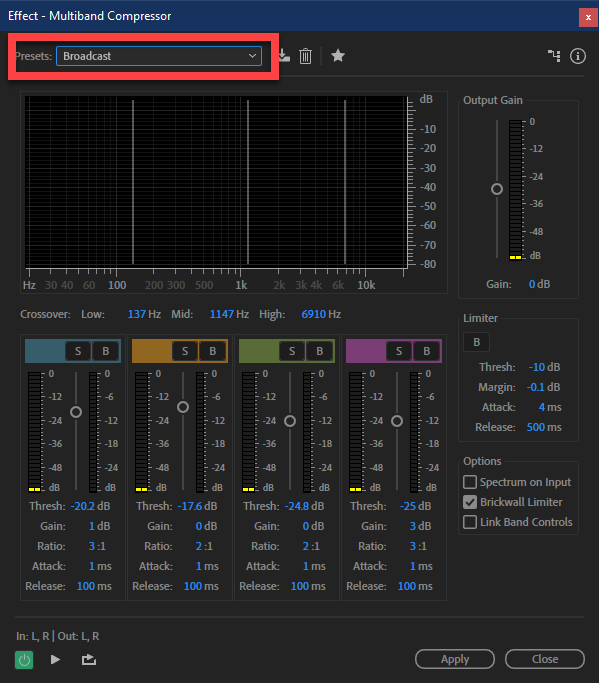
Audio Compression is some complex techno-wizardry with a simple outcome: it makes you sound better! All the trimming and de-noising we’ve done up to now created a clean slate where the compression filter can do its work, and the results can be dramatic.
Applying compression is as simple as it gets: pick the filter you like and click the go button. For the Tribify explainer video (which we processed on Adobe Audition) we used the Multi-Band Compression effect with the Broadcast filter. There are plenty of options to try, so play around and pick the one you like best!
Once your audio sounds great in Audition or Audacity, export it to a WAV file (which is a high-quality raw audio format) and share it with your explainer video producer!
The Video
Most explainer videos use some kind of animation, and a really popular kind (which the Tribify one uses) is whiteboard animation.
You can go out there and buy software to help you make your own whiteboard video. VideoScribe is a good example. Word to the wise: don’t! The learning curve is steep, and it is faster and cheaper to work with somebody who has already negotiated it.
If you go to outsourcing platform Fiverr, you will over a thousand providers in the Whiteboard & Animated Explainers section. It’s nuts! We communicated with literally dozens of these people, and the vast majority were a disappointment: after a couple of exchanges it was very clear that their goal was to churn out a generic video with as little work and as few iterations as possible before moving on to their next victim customer.

It was sort of a demoralizing experience… until we met Fiverr seller keiracarmen.
Keira is located in Sri Lanka. She’s super strict about Fiverr rules… we never learned her real name, and we don’t know if she is a man, a woman, or a team of six. She wasn’t telling, so we just called her Keira and moved on.
What was immediately apparent, though, was that Keira had a completely different approach from all the other explainer video sellers. She was consultative. She applied no sales pressure. She offered interesting ideas.
She was also reasonably fast and didn’t mind iterating until we got the video just right. So it took about a week to get to our first draft, and then we did a revision every couple of days for about another week until we got where we wanted to be.
The cost of all this was a whopping $316.50. We tacked a 10% tip on top of that, which Kiera appreciated but it hardly seemed like enough. Hence this very enthusiastic referral!
Anyway, here’s what we shared with Kiera:
- The WAV audio file.
- The script.
- Some graphics we had already produced, which we thought she might use in the video.
That’s it! We shared the script and the audio on an Evernote link so we could revise the script and just notify her in the Fiverr chat instead of sharing new files. This worked out well because we actually did a small revision, but we really could just as easily have posted new files.
One note about revisions: it really pays to have your script and audio more or less set in stone before passing them to Keira for animation. For the one revision we did make, we were careful not to change the timing of the rest of the audio, so that Kiera could simply apply to new audio file without having to re-jigger timing throughout the video.
The bottom line: make life easy on your video producer and you’ll get a better result, faster… which means you will get more iterations done at the same cost.
And don’t be afraid to iterate! Whether you work with Keira or somebody else, if you chose well then your video producer cares just as much as you do about getting to a result you absolutely love. You will not know what your animated script looks like until you actually see it. Use that as you starting point and dial it in from there.
Show & Tell
I hope all this was helpful!
If we’ve motivated you to run out and make an explainer video—especially if you use our mysterious friend Keira on Fiverr—please share a link to it in the comments below!